*** UPDATE*** I had 2 people say that they couldn't open the pattern and I am so sorry!!! I have changed hosting sites so it should be all fixed but if anyone has a problem PLEASE email me and I will email you the pattern directly!!! amyedunn@gmail.com
Supplies:
- square of fabric 7 1/2" x 10 1/2" for top of bib
- square of fabric 8 1/2" x 11 1/2" for bottom of bib
- square of chenille 16" x 11 1/2" for bib backing
- lightweight fusible interfacing
- thread
- ribbon, ric rac, or trim of your choice (optional)
- rotary cutter/mat/ruler
- 2" piece of 1/2" velcro
- pattern for the bib top
- pattern for the bib bottom
Tape your two pattern pieces together making sure that the line that joins the two pieces is visible. Please excuse my crappy hand drawn pattern, this is the first time I have done something like this on the computer! :)
The first thing we are going to do is join the two squares of fabric. Place your smaller square with one long side centered on a long side of your larger square with right sides together.
Sew this seam with a 1/4" seam allowance. Press the seam allowances open. You will end up with this.
Take your fusible interfacing and trim it to fit just inside this wonky rectangle you just made. Fuse according to the directions. I find that I get a lot less puckering if I DO NOT use steam.
Flip your rectangle over and line up the seam on your fabric with the line on your pattern piece. This is so that the seam doesn't end up all wonky on your finished bib.
Carefully cut around your pattern piece. You are going to cut the same piece out of your chenille. You will end up with two identically shaped pieces. I flip my chenille over so that the soft, fluffy side is down. I think it is easier to get an accurate cut this way. It also assures that your two bib pieces will match up perfectly.
Now you are going to add your ribbon or other trim. Center the ribbon along your seam, use lots of pins to insure that it doesn't slip when you are sewing it down. Sew along both sides of the ribbon (or down the center if you are using ric rac). If you choose not to put something over the seam, I would recommend topstitching on either side of the seam to help stabilize it and to make it a little more attractive.
At this point, we are going to add the velco and a label, if you have one. Pin 1 side of the velcro to the right hand tab of the fabric bib piece and the other side of the velcro to the right hand tab of the chenille bib piece. I position the velcro in the center of the tab about 1"from the curved edge.
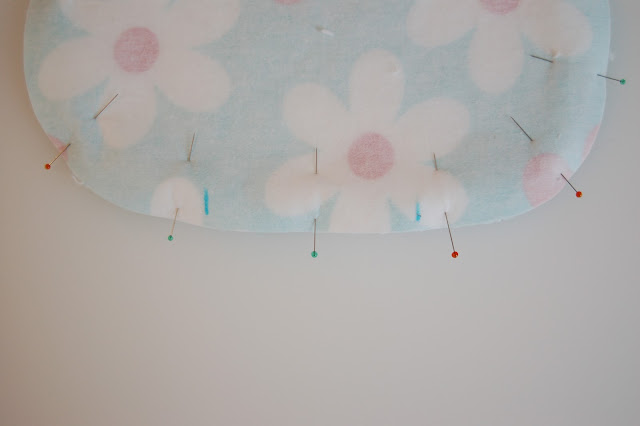
Now put the two bib pieces right sides together being careful to match up both tabs and, of course the rest of the bib. Use lots of pins to keep the layers together and help to keep them from shifting. The chenille can creep a little so I tend to pin closer than I would normally. Make sure that you clearly mark a space at the bottom of the bib to leave open so that you can turn it right side out after it is sewn together. The second picture shows my pen marks. I leave an opening that is about 2 1/2" to 3".
Starting at one of your markings, sew around the perimeter of your bib with a 1/4" seam allowance. Remember to backstitch at the beginning and end. Go slowly, especially around the tabs and the neck opening.
Carefully turn your bib right side out and use a chop stick or turning tool to gently poke out those tabs. Iron everything nice and flat with a steam iron. Neatly turn under the edges of the gap that you left open for turning and iron them so that you can get it ready to close when you topstitch in the next step. ***Remember to be careful ironing around velcro as it can melt!***
Pin your opening closed.
Topstitch all the way around your bib with an 1/8"-1/4" seam allowance. Make sure you have thread in your bobbin that matches your chenille. I always find it helpful to lengthen my stitch slightly when topstitching multiple layers or thick fabrics, like chenille. It puts less stress on your machine and leads to a more even stitch length for the topstitch which is always more attractive!
Voila! Now go find a cute, chubby little neck to put your bib on!!! :)
Other suggestions for materials and embellishments:
for the backing -
- terry cloth
- minky
- vintage chenille blankets
for embellishments -
- appliques
- ribbon
- pom pom tim
- lace
If you make any bibs using this tutorial, I would LOVE to see them!!! Enjoy! :)
***please note that this tutorial is for personal use only, thank you!***


No comments:
Post a Comment